Monday Must Haves: Hair Products

Monday, August 10, 2015


When it comes to my hair, I am pretty low maintenance. I usually just, brush, shampoo, condition & dry. I am not a huge fan of hair products, gasp! I know, I know, I'm a shame on the female species haha! But the products I do own are the ones I cannot live without. They make having and maintaining long hair easier, so much easier.

Here's a few of my must haves...
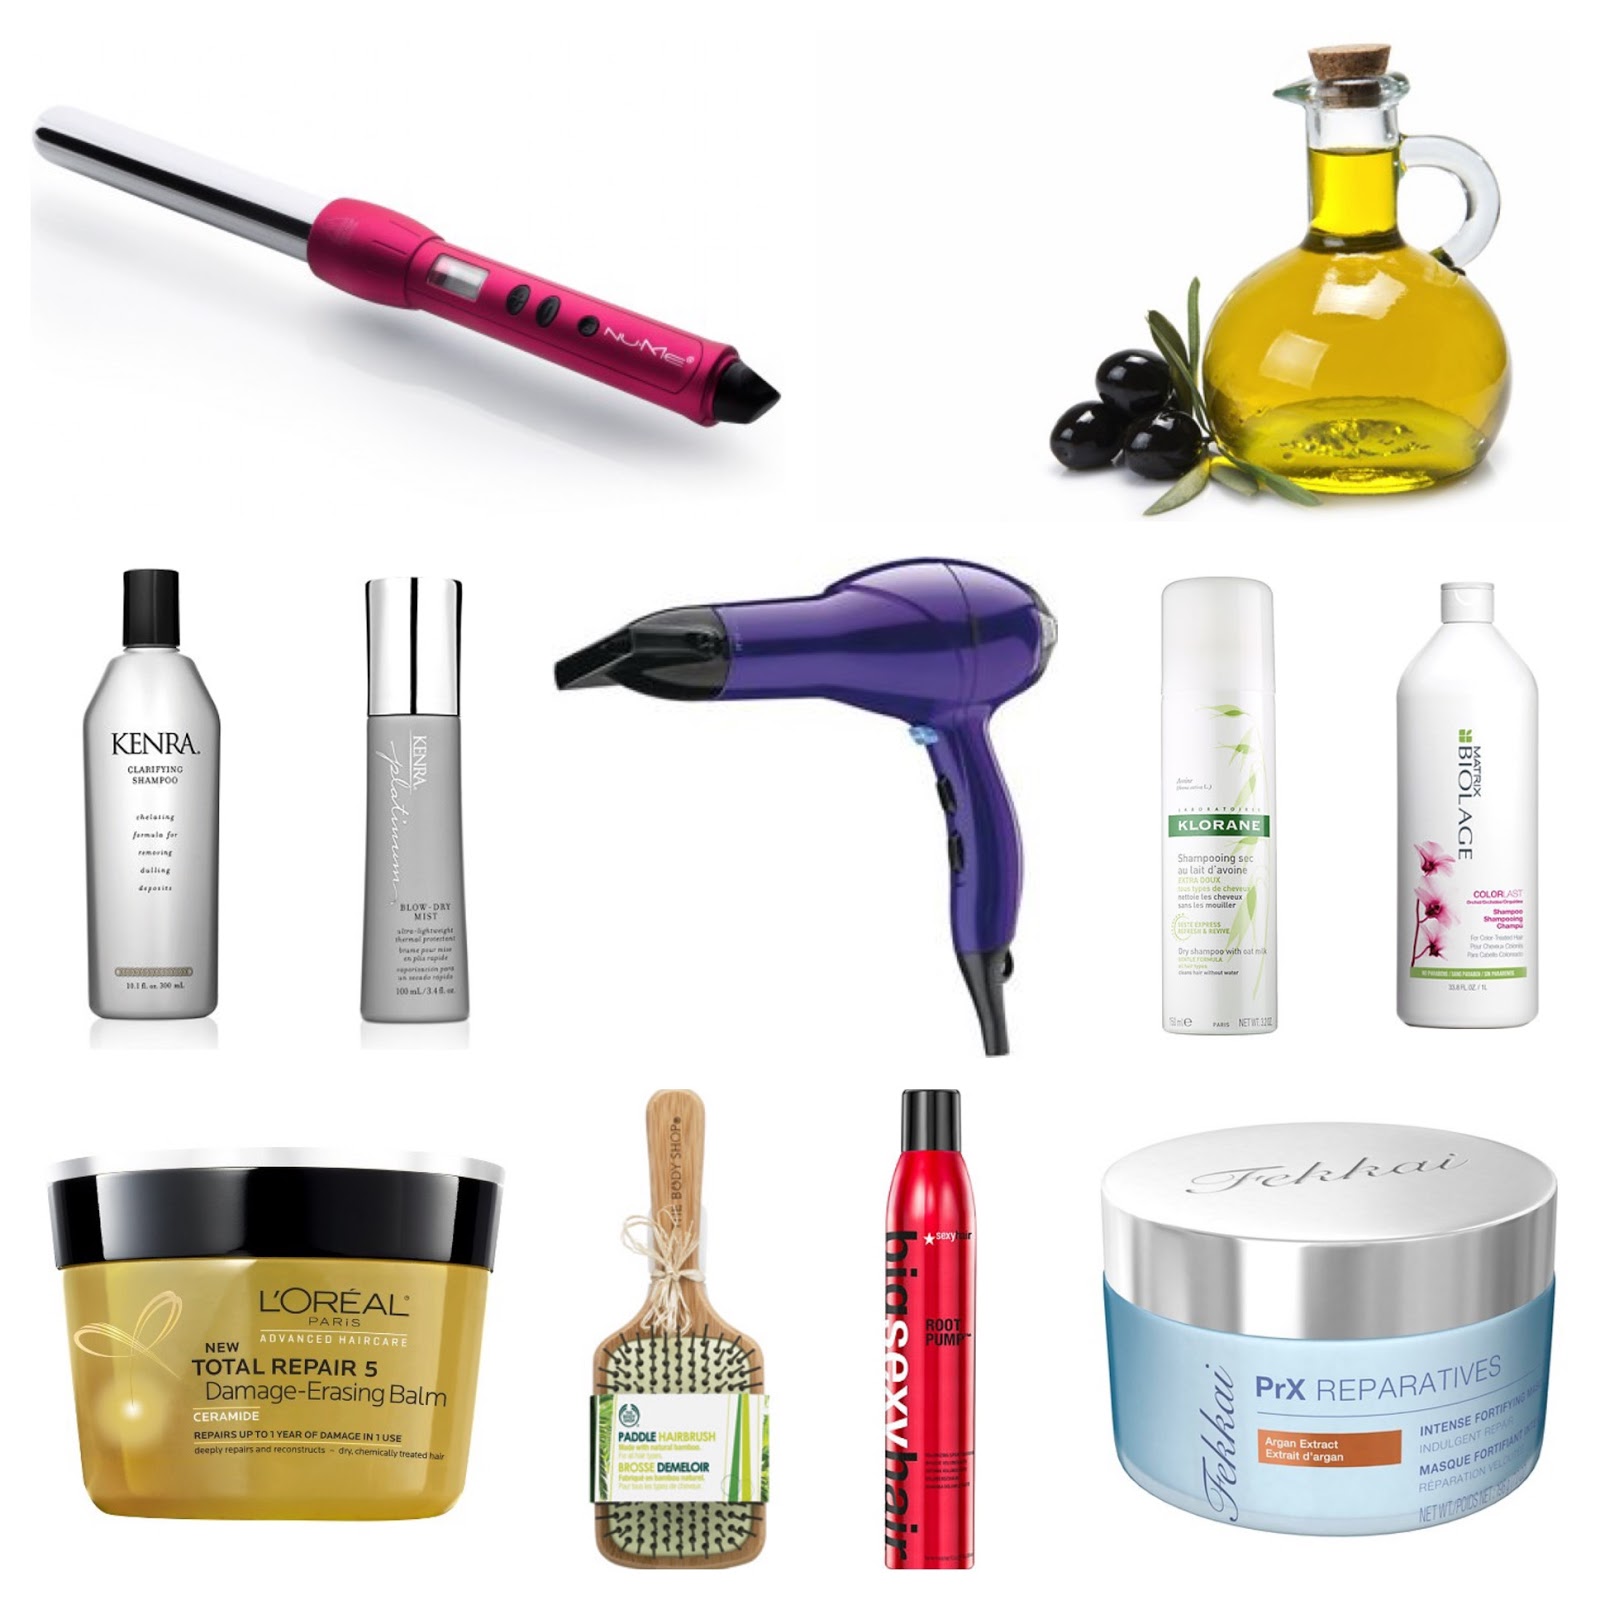
  • Nume 25mm Curling Wand. This heats up super quick and works awesome. My curls stay in all day long! But be careful, it gets hot and there's no protective tip. Use a heat-safe glove, don't be a rebel like me, it hurts lol! Link
  • Olive Oil. You can get this anywhere. I prefer extra virgin olive oil, EVOO. I use this when my hair seems 'thirsty' and just need an extra boost. It's my hair mask and its pretty inexpensive. I warm up about 1/4 cup of the oil and massage it throughout my hair from roots to tips evenly. Next I wrap my hair up in a bun and secure it with a hair clip. Then I cover my hair with a plastic shower cap and on top of that, a hot towel from the dryer. I leave it in at least 90 minutes. Rinse, shampoo and condition normally. Link
  • Kenra Clarifying Shampoo. I love this shampoo. It gets rid of buildup without being too harsh on my hair. It has a nice grapefruit citrus clean scent. It's not overly drying but it definitely gets rid of the junk. I use this 1-2 times per week. Link
  • Kenra Platinum Blow-Dry Spray. I cannot, I repeat, cannot live without this product! It speeds drying time by half all while protecting and giving my hair a smooth gorgeous shine. I use this every time I blow dry. Seriously I love this stuff! Link
  • Conair Infiniti Pro Dryer. Awesome affordable blow dryer. I love the different speeds and heat setting. The cool shot is an awesome feature. It's also light weight and quiet. Link
  • Klorane Dry Shampoo. I am not usually a huge fan of dry shampoo, but this stuff is amazing! Seriously the best I have ever tried. It doesn't leave a chalky residue and it smells great! Link
  • Biolage Colorlast Shampoo by Matrix. I love this shampoo and the scent is so yummy! I notice that my hair color does last longer when I use this shampoo. I love the way it lathers and still keeps my hair color bright. Link 
  • L'Oreal Paris Advanced Haircare Total Repair 5 Damage-Erasing Balm. This is a great deep conditioner and the price is awesome too. This has a nice scent and it leaves my hair silky soft. Link
  • The Body Shop Paddle Hair Brush. I have had this brush for almost 10 years. I absolutely love this brush! I even bought it for two of my friends and they love it too! My hair is to the middle of my back and sometimes waist length. Smooth round pin bristles glide easily through my hair and helps keep frizz away while blow drying. I also love that it's made from bamboo which is considered a renewable source to help protect our planet. Link
  • Big Sexy Hair Root Pump Spray Mousse. I have thin, fine, limp hair and this is the only root booster that I've found that actually works. I have body and lift all day long after using this! Link
  •  Fekkai Reparative Mask. This is heaven in a jar. It smells delicious and works amazingly. My hair is so soft and shiny after I use this! It only takes a little bit too, so this jar lasts quite awhile. I use this 3 times per week. Link

There you have it, my favorite must have hair products. What are your favorite products? Let me know :)

*I am not compensated for my reviews, these are just my opinions and I wouldn't recommend anything I didn't love. 


Sweet and Simple Blackberry Sauce

Saturday, August 8, 2015

Looking for an easy and delicious dessert topping? Look no further, this amazing blackberry sauce is ready in 5 minutes and only has 5 ingredients. I love recipes like this!


I am always looking for new ways to freshen up my desserts and this blackberry sauce with a little hit of lemon definitely hits the spot! This is awesome on ice cream, cheesecake, pound cake, or even make blackberry shortcake. This is delicious on pancakes and waffles, oh so good! You could even turn it into a berry vinaigrette for your salad. This would also be delicious made with red raspberries.

The 5 Ingredients. Blackberries, lemon, sugar, cornstarch and water


Fresh Picked Oregon Blackberries


Blackberry Sauce

Yield: 2 Cups

First mix together, 2 tsp cornstarch, 2 tbsp water


Add in 1 tbsp fresh squeezed lemon juice 


 Mix everything together and sit aside


In a small ceramic or Teflon coated sauce pan add in 12 oz of blackberries and 1/4 cup of sugar 


Sir together and cook over medium high heat for 3 minutes 


Stir frequently. This is what they look like after they have been cooking for about 2 minutes


After 3 minutes the berries should be breaking down and releasing their juices. Now its time to add in the cornstarch mixture. Make sure to stir the mixture again before pouring it in


Let it cook another 2 minutes until thickened. Stir often and break up the berries a little bit with the back of your spatula


Turn off the heat and admire that beautiful sauce 


Let it cool a couple minutes and then serve over your favorite dessert


 I served mine over vanilla ice cream. It is so yummy!


Put your leftovers into a glass container and store it in the refrigerator up to 10 days.
I actually packaged mine up in a mason jar, and added a label & some jute. We got invited to a friends house for dinner and I was in charge of bringing the dessert. This was such a fun way to share this delicious sauce. It was a huge hit and there wasn't a drop left! We served it over icecream and devil's food cake. 


Ingredients:
  • 12 oz fresh blackberries
  • 1/4 cup granulated sugar
  • 2 tsp cornstarch
  • 2 tbsp water
  • 1 tbsp fresh squeezed lemon juice
Directions:
  1. In a small bowl mix together cornstarch, lemon juice and water, sit aside.
  2. In a small ceramic or Teflon coated sauce pan cook the blackberries and sugar over medium high heat for about 3 minutes, stirring frequently until berries begin to break down and release their juices.  
  3. Next stir the cornstarch mixture into the berries and boil for 2 minutes until thickened. Stir often and break up the berries a little bit with the back of your spatula.
  4. Remove from heat and let the sauce cool a couple minutes. 
  5. Serve over your favorite dessert and enjoy!

Feel Good Friday ~ Pretty Petals

Friday, August 7, 2015

I just love pretty things, especially flowers! They make me so happy and they always put a smile on my face. They just give me that 'feel good' feeling. Whether they are growing in my yard or brought home to me by my loving husband, I adore them.

Here are a few of my favorites that I've enjoyed this year so far.

These Hydrangeas were a Thinking of You / Get Well Soon gift 


Just because I love you bouquet of Roses and Carnations from my Hubby

Clematis that is just so beautiful and out of control at my father-in-laws house


Little Lady Bug on a Sunflower in my backyard


My favorite flowers are Peonies that grow in my backyard in the Spring


Roses and Hydrangeas cut from my garden 


Stargazer Lily and Roses from my Hubby on our last anniversary


Pretty little arrangement I put together last Fall


The world needs more beautiful, sweet & pretty things. I hope you have a happy & great Friday :)

Fireplace Makeover and Tutorial: How to Whitewash Your Stone Fireplace

Wednesday, August 5, 2015

Fireplace Makeover and Tutorial: Before and After

I am so excited to to share this project with you! I have been wanting to do this for years and have finally got up the nerve. I honestly don't know why it took me so long to bite the bullet and start, but I'm so glad that I did! 


Repainting the dated brass and black fireplace doors, surround, stone, and hearth updated the look of my living room so much. 

It was a little more time consuming that I first thought but it wasn't bad at all. It took me about 5 days working off and on. 
   
These are most of the supplies that I used for the update. 


1.  Painting the fireplace doors and surround


To paint the brass doors and surround I needed:

Rust-oleum High Heat Satin Black Enamel Paint
Foam brush
Fine Steel Wool
Cloth for cleaning
Paint stick
Paint can opener

The brush on enamel paint is more expensive, more time consuming and harder to work with because it is streaky and it takes more coats. But I decided to use it instead of the spray paint because I didn't want to tape everything off with plastic and make a spray tent so the paint didn't get all over my room, carpet, walls and me. 

Start by taking the steel wool and roughing up the shiny brass. That makes it easier for the paint to adhere to it. 


Then wipe everything off with a damp cloth and let it dry. Make sure you're staring with a nice clean surface and make sure to prep your area by laying down newspapers and taping off any areas if necessary. 

Open the enamel and stir, don't shake, you don't want air bubbles. 


Dip your foam brush in the enamel and lightly coat the tip. 


Starting at the top and working your way down, use even strokes and paint all of the brass. I also painted the black metal as well so it was all fresh and evenly painted the same color. Make sure and get in all the nooks and crannies. 


I waited about 10 hours between coats. It took me 2 days because of drying time and I did 3 coats. Now it looks fantastic and is super smooth and even, not streaky at all. 


2.  Painting the fireplace stones


The warm tone, orangey stones were never my style, and in my option, really dated my home. But the thoughts of painting it totally scared me at first. What if I messed it up? There's no going back to the raw stone once you get paint on them. So glad I got over that fear!


Prep your area buy protecting your floors and walls and freshly painted surround and doors. I used 9" paper and and blue painters tape. Also if you have any areas that are missing mortar, caulk and let dry completely before painting. 


To white wash the stone I needed:
Paint (I choose interior Valspar Signature paint in Swiss coffee in eggshell. I got a quart and have well over half leftover)
Water
Paint stick
3" brush
Old t-shirt 
Trim bucket
Paint can opener 


Open paint and stir well. Add paint and then water to the trim bucket and stir well. (I did a ratio of 1 part paint to about 3 parts water) I wanted a lighter wash where I could still see a little variance of stone color. 

Add the paint into the tray first (1 part paint)


Then add in the water second, and mix together well (3 parts water)


Dip the tip of the brush into the paint, don't use the same brush as you used to mix the paint and water, there will be way too much on it. Start with a small amount, it really goes a long ways. 

Start dabbing and painting and swirling your brush on the stones. I had to do all three techniques for it to look right. 


Then dab off excess paint with the t-shirt. I also gave the mortar a thin coat as well. The stones took one coat. You may want to do more depending on the look you want to achieve. 


Making progress!


Stones are done!


3.  Painting the hearth


The hearth took a little more work. I could have just left it white washed but it just didn't look right. It was smooth and polished stone so it didn't absorb the paint the same way as the stones on the face of the fireplace. It was too even and didn't look natural.


Luckily for me, my friend Amy gave me a few paint sample to try out for my walls, and they were just the right colors for the hearth, yay!


I got the idea for painting my hearth to look like stone here. I didn't use acrylic paint or glaze, I had the latex samples that worked awesome!

To paint the hearth I needed:
3-5 different colors of latex paint
Sea sponge
Paper plate

I drizzled a little bit of all 4 colors into a paper plate. Then got the sponge wet and wrung it out.
I took my damp sea sponge and dipped it into the paint a few times and then starting dabbing it all over my white washed hearth.


Make sure to turn the sponge all different directions and work randomly all over the stone until it looks right to you. You're not looking for uniformity and perfection, nature isn't perfectly symmetrical. 


Almost done. You can really see the difference between the white and sponged stone here.


That's it, it's pretty easy and it made a such a huge difference!


After finishing this project, it kind of started a ripple effect. Nothing that I hadn't planned on doing, but it pushed me to want to do things a little faster so my living room could be completely redone and updated. New wall paint and decor to go with my new fresh fireplace are next on the to do list!

Thanks for reading :)

Powered by Blogger · Designed by Pish and Posh Designs